Dentova
Installing Dentova Template Kit
In this guide, we’ll walk you through the complete installation process step by step. make sure you follow each step carefully to avoid common setup issues.
Important:
Importing our template kit will override your site settings and Elementor global styles. Please ensure you have backed up your site before proceeding.
Before importing the template kit, make sure the following plugin requirements are installed and activated:
For the best performance, we recommend using the Hello Elementor theme. Some features may not work properly with other themes.
Step 1: Import Template Files Using the Template Kit – Import Plugin
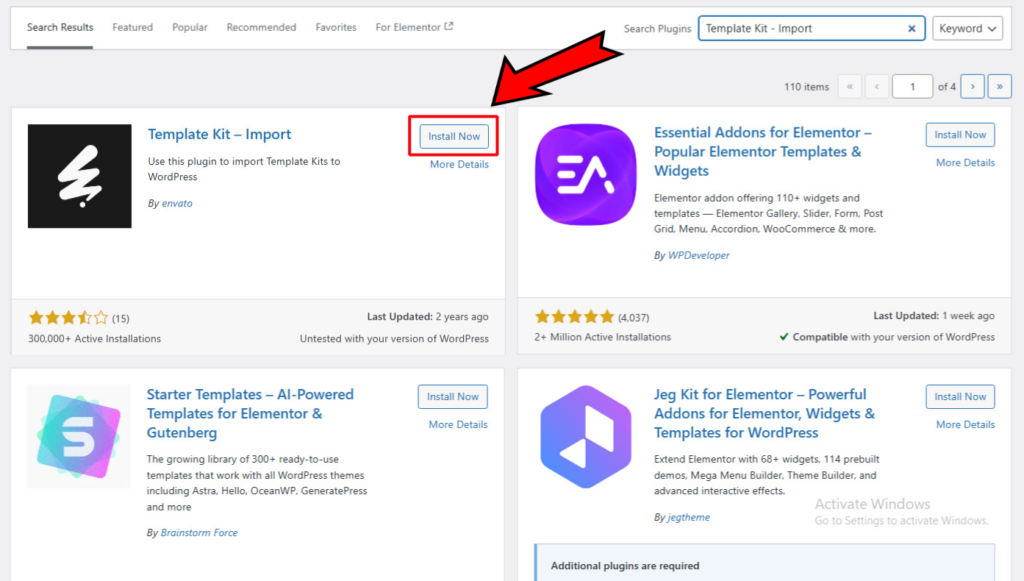
- Navigate to
Plugins>Add Newand search for Template Kit – Import - Install and activate the Template Kit – Import plugin
- Once activated, go to
Tools>Template Kit - Click “Upload Template Kit ZIP File” and upload the template file you downloaded from Envato Market
- Wait for the import process to complete. The Template Kits page will appear along with a list of templates when completed
Step 2: Create a New Homepage in the Pages Panel
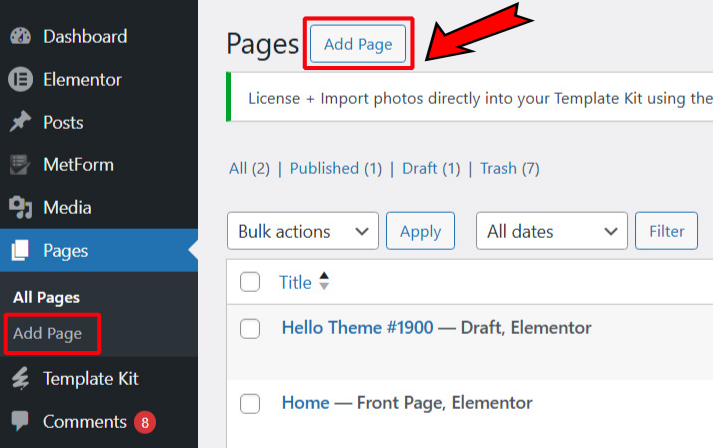
- In the WordPress dashboard, go to
Pages>Add New Page - Enter a title for your page, such as “Home”
- Click the
Publishbutton to save your new page
Step 3: Import the Template into the Home page
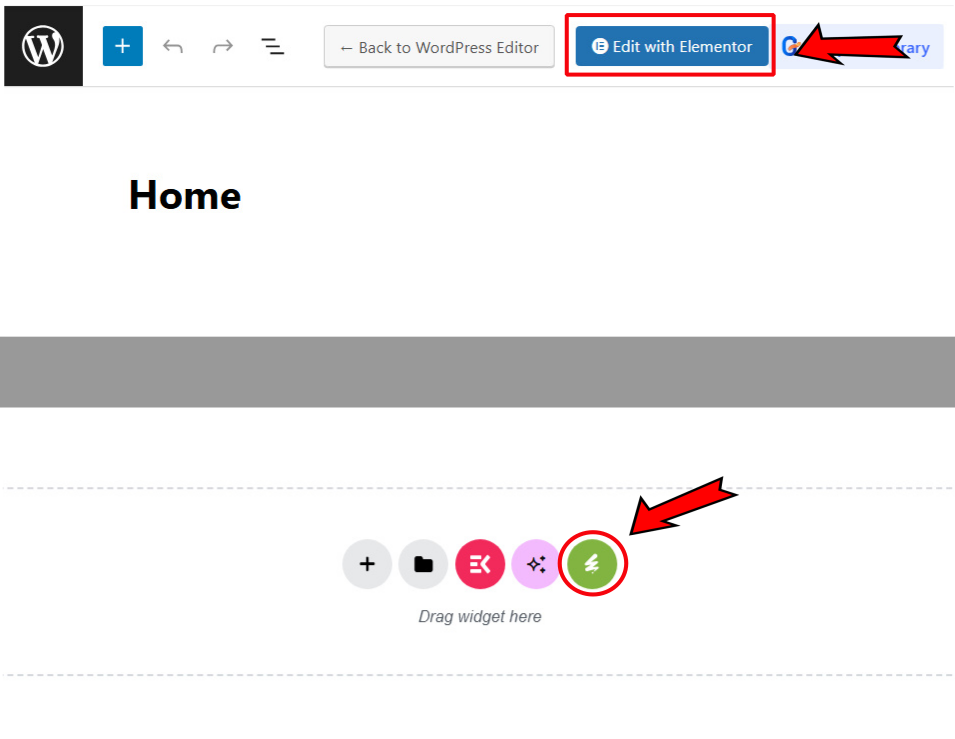
- After publishing the page, click Edit with Elementor
- In the Elementor editor, click the Envato icon on the screen to open installed template kits
- Select which template you want to import then click Insert Template
Attention!
Customize the layout and content as needed using Elementor’s drag-and-drop interface, and repeat steps 2 and 3 to import other pages!
Step 4: Display the Home page as the main page
- Go to
Settings>Reading - Select A Static Page under Your homepage displays, then select the Home page on the Homepage
- Click Save Changes to apply the changes
Step 5: Add Menus to your website
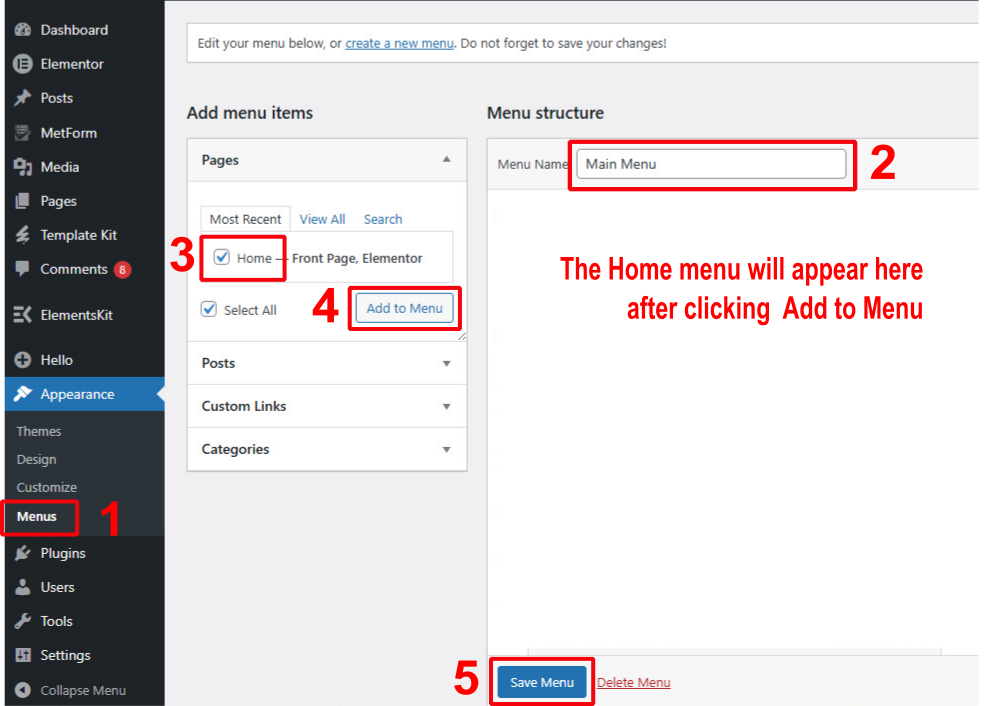
- Go to
Appearance>Menusin your WordPress dashboard - Click Create a new menu
- Enter a title for your menu, such as “Main Menu”
- Select the pages you want to include in your menu (e.g., the page you just created)
- Click Add to Menu
- Arrange the menu items by dragging and dropping them into your desired order
- Click Save Menu to apply the changes
Step 6: Customize the Font and Color
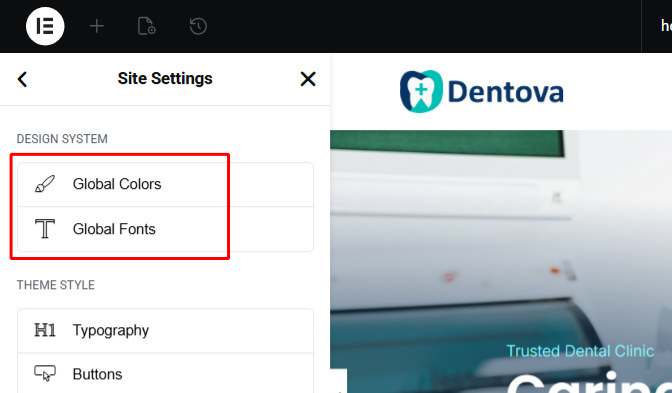
- Open one of the Imported pages with Edit with Elementor option
- Navigate to the upper left of the panel and select Site Settings
- Choose what you want to customize, the Global Colors or Global Fonts
- After that, change the color or font according to your style
- Don’t forget to save your settings by clicking the Save Changes button in the bottom left
That’s it!
Your Dentova template should now be succesfully installed. If you encounter any issues, feel free to submit a support ticket and our team will assist you
( Create a Ticket )
